Sealing a basin drain is a crucial step in ensuring the proper functioning and longevity of your plumbing system. As a trusted Basin Drain supplier, we understand the importance of this process and are here to guide you through the best methods to achieve a secure and leak - free seal. In this blog, we'll explore different aspects of sealing a basin drain, from the materials involved to the step - by - step procedures.
Understanding the Basics of Basin Drains
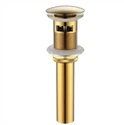
Before we dive into the sealing methods, it's essential to have a basic understanding of basin drains. Basin drains come in various types, including Black Click Clack Waste, Brass Pop Up Sink Drain Waste, and 32mm Basin Waste With Overflow. Each type has its own unique features and installation requirements, but the goal of sealing remains the same: to prevent water leakage and blockages.
The main components of a basin drain typically include the strainer, the tailpiece, and the trap. The strainer sits at the top of the drain and catches debris, preventing it from clogging the pipes. The tailpiece connects the strainer to the trap, which is a U - shaped pipe that holds a small amount of water to create a barrier against sewer gases.
Materials Needed for Sealing
To seal a basin drain effectively, you'll need the following materials:
- Plumber's Putty: This is a soft, pliable material that is commonly used to create a watertight seal around the base of the strainer. It's easy to work with and can be molded to fit the shape of the drain opening.
- Teflon Tape: Also known as plumber's tape, Teflon tape is used to seal threaded connections. It's wrapped around the threads of the tailpiece and other fittings to prevent water from leaking out.
- Pipe Joint Compound: This is a thick, paste - like substance that can be used in place of Teflon tape for sealing threaded connections. It provides a strong, durable seal and is resistant to water and chemicals.
- Adjustable Wrench: You'll need an adjustable wrench to tighten the nuts and bolts that hold the drain components together. Make sure the wrench is the right size for the fittings you're working with.
Step - by - Step Guide to Sealing a Basin Drain
Step 1: Prepare the Drain Opening
Start by cleaning the drain opening thoroughly to remove any dirt, debris, or old putty. Use a wire brush or a rag to scrub the surface clean. Make sure the opening is dry before proceeding.
Step 2: Apply Plumber's Putty
Take a small amount of plumber's putty and roll it into a thin rope. Place the rope around the base of the strainer, making sure it forms a continuous seal. Press the strainer firmly into the drain opening, and then tighten the locking nut underneath the sink using an adjustable wrench. Wipe away any excess putty that squeezes out around the edges.
Step 3: Connect the Tailpiece
Wrap Teflon tape around the threads of the tailpiece in a clockwise direction. Make sure to wrap the tape tightly and evenly, covering all the threads. Then, screw the tailpiece onto the strainer, tightening it with an adjustable wrench.
Step 4: Install the Trap
If your drain has a trap, connect it to the tailpiece using a slip - joint nut. Wrap Teflon tape around the threads of the nut and the tailpiece, and then tighten the nut using an adjustable wrench. Make sure the trap is properly aligned and that there are no kinks or bends in the pipes.
Step 5: Check for Leaks
Once all the components are connected, turn on the water and let it run for a few minutes. Check for any signs of leakage around the drain, including under the sink and along the pipes. If you notice any leaks, tighten the fittings further or apply additional putty or tape as needed.
Alternative Sealing Methods
In addition to the traditional methods described above, there are also some alternative ways to seal a basin drain:
- Silicone Sealant: Silicone sealant can be used as an alternative to plumber's putty for creating a watertight seal around the strainer. It's more flexible than putty and can be used in areas where there is movement or vibration. However, it takes longer to dry and may not be as easy to remove if you need to make changes to the drain in the future.
- Compression Fittings: Some basin drains use compression fittings instead of threaded connections. These fittings rely on a compression ring and a nut to create a tight seal. To install a compression fitting, simply slide the compression ring onto the pipe, followed by the nut. Then, insert the pipe into the fitting and tighten the nut using an adjustable wrench.
Troubleshooting Common Issues
Even with the best sealing methods, you may encounter some issues with your basin drain over time. Here are some common problems and how to solve them:
- Leaking Strainer: If water is leaking from around the base of the strainer, it may be due to a loose or damaged seal. Try tightening the locking nut underneath the sink, or remove the strainer and re - apply plumber's putty.
- Leaking Trap: A leaking trap can be caused by a loose connection or a damaged gasket. Check the nuts and bolts that hold the trap together, and tighten them if necessary. If the gasket is damaged, replace it with a new one.
- Clogged Drain: If the drain is clogged, start by using a plunger to try and dislodge the blockage. If that doesn't work, you can use a drain snake to remove the debris. If the clog persists, you may need to call a professional plumber.
Benefits of Properly Sealed Basin Drains
Sealing a basin drain properly offers several benefits:


- Prevents Water Damage: A leaky drain can cause water to seep into the cabinet or floor below the sink, leading to mold growth, rot, and other structural damage. By sealing the drain effectively, you can prevent these problems and protect your home.
- Reduces Odors: The trap in a basin drain holds a small amount of water to create a barrier against sewer gases. If the drain is not sealed properly, these gases can escape into your home, causing unpleasant odors.
- Extends the Lifespan of the Drain: A well - sealed drain is less likely to develop leaks or clogs, which can extend the lifespan of the drain components and reduce the need for costly repairs.
Conclusion
Sealing a basin drain is a relatively simple process that can be done by most homeowners with the right tools and materials. By following the steps outlined in this blog, you can ensure that your basin drain is properly sealed and functioning correctly.
As a Basin Drain supplier, we offer a wide range of high - quality drain components, including Black Click Clack Waste, Brass Pop Up Sink Drain Waste, and 32mm Basin Waste With Overflow. If you're in the market for a new basin drain or need advice on sealing your existing one, don't hesitate to contact us. Our team of experts is here to help you find the best solutions for your plumbing needs.
References
- "Plumbing Handbook", John Doe, 20XX
- "Home Improvement Guide", Jane Smith, 20XX
- Manufacturer's instructions for basin drain components